
My girls love fairies so during the summer holidays we made our own fairy wings. Both my toddler and 5 year old enjoyed this simple craft and were able to do most of it with minimal help from me. What’s more, not only did they enjoy making these wings but they loved wearing them too such as when we visited a fairy trail the following day. They could also be butterfly wings. Read on to find out how to make fairy wings for kids below. Find more summer art activities here.

Ad – This post contains affiliate links. As an Amazon Associate, I earn from qualifying purchases. If you purchase through the links I may earn a small commission at no extra cost to you.

How to make fairy wings with kids
This is a really fun way to make DIY fairy wings for kids. You can also follow these steps to make butterfly wings so we could have called this how to make butterfly wings.
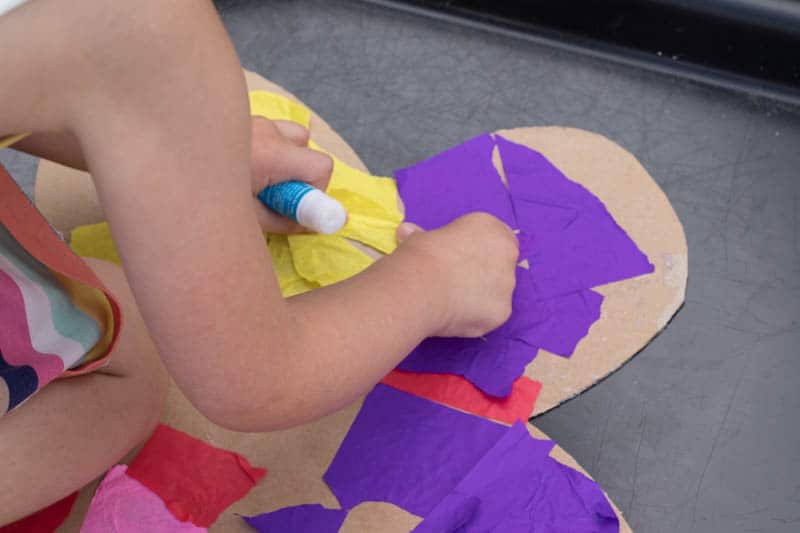
Once an adult has cut out a pair of cardboard wings, kids will have great fun decorating the wings however they like. We used PVA glue and lots of brightly coloured tissue paper to cover the whole wings.
Others ideas for decorating the wings are paints, and other collage materials such as stickers, shiny paper, glitter, strands of wool, leaves or flowers. The options are unlimited.
Let your child be as creative as they like and see what ideas they have. Just make sure the wings don’t get too heavy.
Once the wings are decorated you can add ribbons to attach them to your child and they are complete. We loved this activity. It was a great way to spend some time together being creative and the wings have been worn a lot since in imaginative play.
You may also like this simple fairy peg doll craft.
You will need:
- Cardboard for the wings (I used packing material that we had lying around)
- Scissors
- * Brightly coloured tissue paper
- Glue sticks or PVA glue Sticky tape
- Ribbon
- * Sticky back plastic
How to make fairy wings
1. Fold your cardboard in half and draw half a butterfly shape. You can make any size wings that you like. I made the toddler fairy wings a little smaller than the pair for my eldest. Once you are happy with the size and shape. Cut the wings out.

2. This is where you can get the kids involved. I set out the wings, some PVA glue and lots of brightly coloured tissue paper. Then I let my girls get creative. We used glue and tissue paper to cover the whole wings, on both sides.


3. Leave the wings until the glue and tissue paper have dried. As I knew these wings would get a lot of wear and I wanted them to be ok outside if it rained a little, I covered them in sticky back plastic (both sides).

4. Attach ribbons to use to tie the wings to your child. I just stuck the ribbons on but they did keep coming unstuck. Adding two holes close together on each side and threading the ribbon through would work better.

Shop for supplies
If you haven’t got a craft cupboard as well stocked as mine, you may need to buy a few supplies. Please note these are affiliate links. This means if you buy through these links, I get a small commission from Amazon. This does not affect the price you pay.

Want more ideas for things to do outside at home?
More bug activities for kids
Find lots of ideas for Bug crafts for preschoolers here.
These Free ladybird pictures to colour are a great quiet time activity.
Pin for later
